Crack No Problem Master the Art of Hard Paddle Board Repair
Summary
- Intro: How To Repair A Small Crack In Your Hard Paddle Board
- How Do You Fix A Crack In A Paddle Board?
- What Is The Best Glue For Paddle Board Repair?
- Can Paddle Boards Be Repaired?
- How Do You Fix A Small Hole In A Paddle Board?
- Final Verdict
- Frequently Asked Questions
- What’s the best way to fix a tiny crack on my hard paddle board?
- Can I paddle with a small crack on my board, or should I fix it first?
- What materials do I need to repair a crack on my hard paddle board?
- Is there a quick fix for paddle board cracks if I’m in a hurry?
- How long does it take for the repair on a paddle board crack to dry?
- Do I need to paint over the repair on my paddle board?
- Will repairing a crack by myself void the warranty of my paddle board?
- Is there a way to prevent cracks in paddle boards?
- How do I know if a crack is too big for a DIY repair?
- Can I use any type of epoxy for my paddle board repair?
- Frequently Asked Questions
Intro: How To Repair A Small Crack In Your Hard Paddle Board
Well, anyone who’s had the sheer joy of slicing through the water on a hard paddle board knows that the slightest crack can put a damper on your day. Now, I’m here to help you navigate the rough waters of DIY repair. So, let’s dive right into fixing that pesky little crack, shall we?
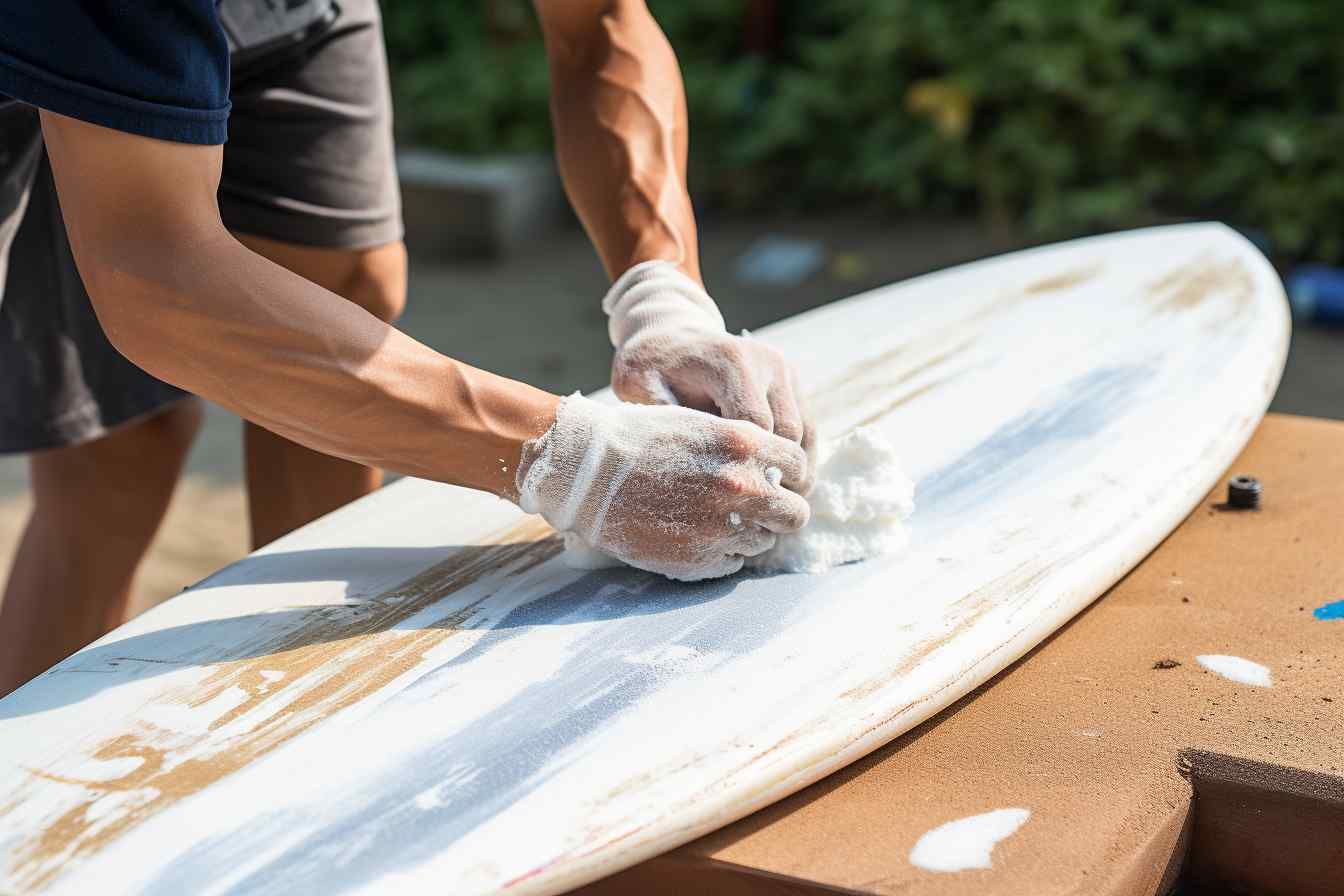
First things first, you’ve gotta clean the area around the crack. I mean, give it a good once over with soap and water, you know? It’s like prepping a canvas for a masterpiece – you wouldn’t slap paint on a dirty surface. Once it’s spotless, let it dry completely; patience is key here.
Now, for the love of all that is aquatic, make sure you’re working in a well-ventilated area. Safety first! Mix up that epoxy resin like you’re a chemist in a high-stakes lab. Apply it meticulously over the crack and smooth it out like you’re icing a cake – but, you know, without licking the spatula.
Let it cure but don’t just twiddle your thumbs. Either take a breather or plan your next water-based escapade, because dreamin’ is free, right? After it’s solidified, it’s time to sand it down. Think of it as sculpting your own David, but a way smaller and less impressive version that you won’t find in a museum. Get that surface smoother than a jazz tune on a Sunday morning.
Lastly, don’t forget to hit it with a coat of paint – if you’re into that sort of thing. Make sure it blends in or stands out, whatever floats your board. And there you have it! I’ve laid it down step by step, but remember, the real trick is taking your time. No rushing through like a bull in a china shop.
Now, get back out there and show those waves who’s boss!
How Do You Fix A Crack In A Paddle Board?
Oh boy, fixing a crack in your paddle board can really get under your skin, can’t it? Especially when you’ve been dreaming about that perfect paddle session and find your board wounded! But no worries, I’ve got the lowdown on patching things up, so you can get back out there.
First off, let’s talk about cleaning out the crack – yeah, it’s kinda like setting the stage for the repair. You’ve got to make sure the area’s spotless before anything else because any dirt or grime can mess with the adhesion, and that’s the last thing we need. So grab a mild soap and water, give the area a gentle scrub, and rinse it well. Just make sure it’s bone dry before you move onto the next step. Moisture hanging around in there is a no-go.
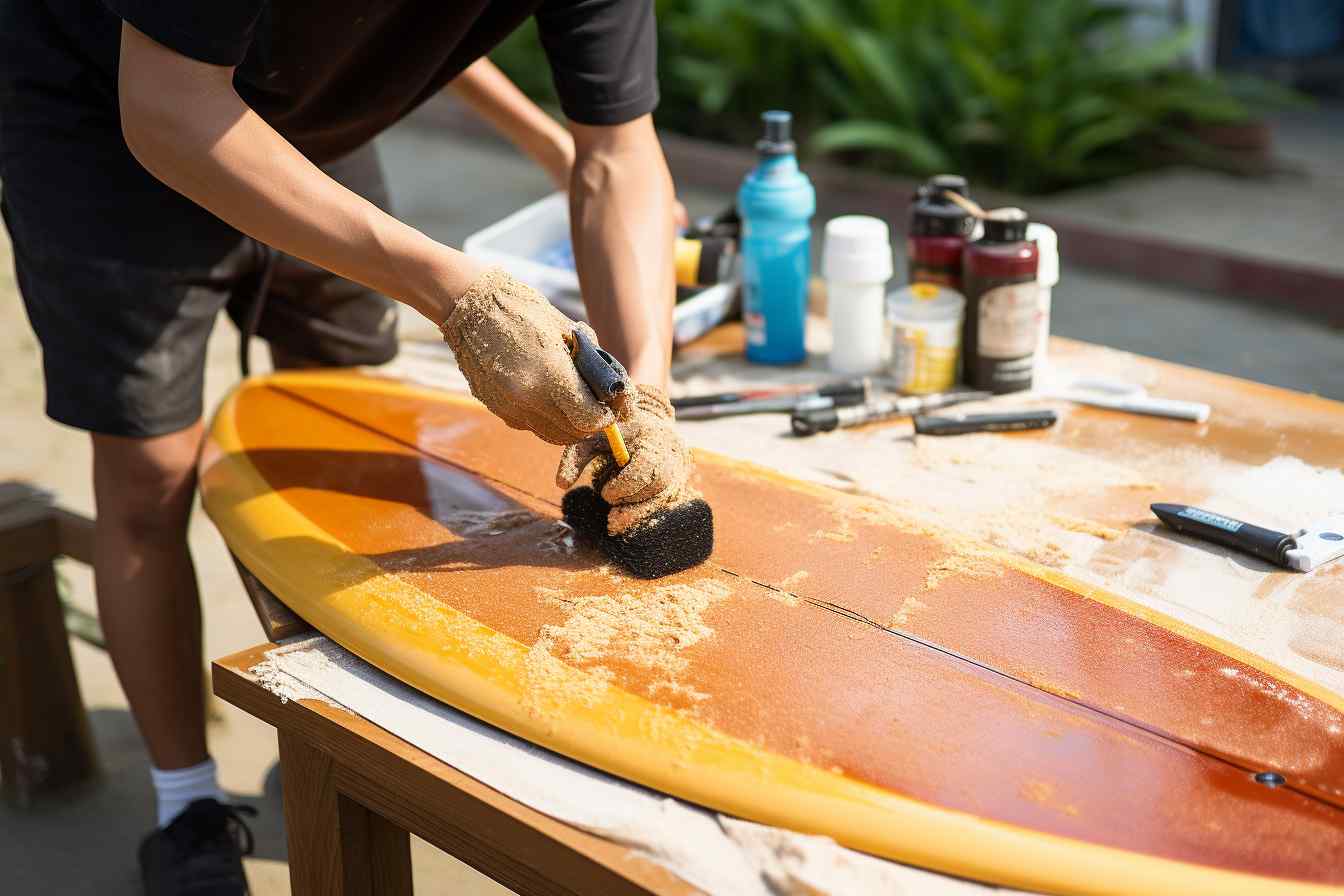
Next up, you’ll wanna sand down the area gently around the crack. Think of it as roughing up the surface so that the patch can cling on for dear life. You’re not sanding your heart out here, just enough to get a nice, even surface. Once you’ve got that sorted, wipe away the grit with a damp cloth, and again, let it dry completely.
Now here’s where things get sticky – literally! Time to mix some epoxy resin, the hero of our story. When you’re measuring it out, precision is key, so make sure you’re following the instructions on the dot. Once it’s all mixed up, apply it to the crack using a plastic spreader or something flat. You want it to seep into the crack completely, filling it up, leaving no voids. But hey, don’t go slathering it on like peanut butter on toast. A nice, thin, even layer will do the trick.
After the application, it’s a waiting game. Curing times vary with different epoxies, so patience is a must. Check on it from time to time – it should harden to the point where you can sand it down again to get that smooth, inconspicuous finish. You’re aiming for that ‘can’t-tell-there-was-ever-a-problem’ look.
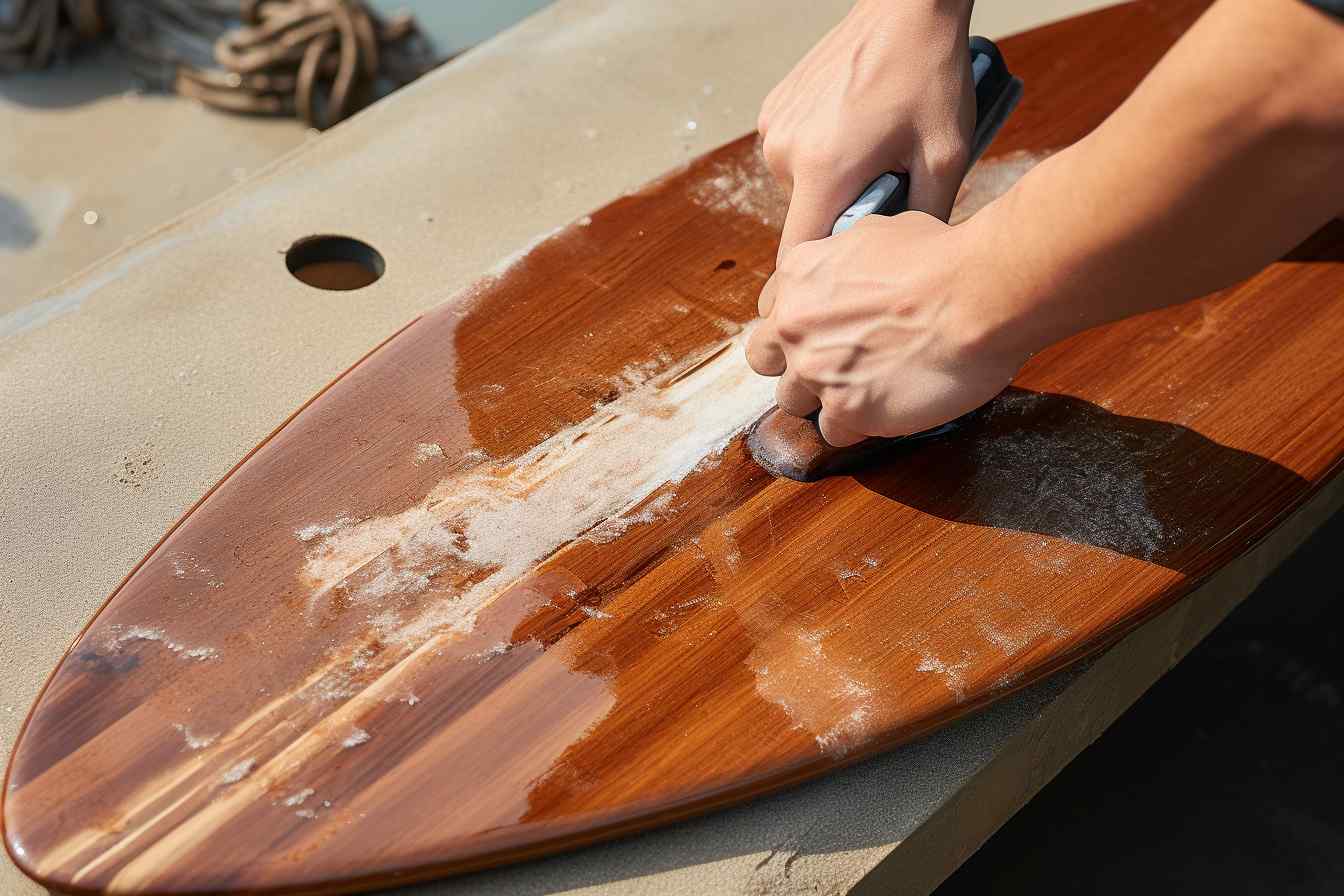
Finally, once you’ve sanded it down and wiped away the dust, it’s smart to give it a waterproof seal with some good ol’ UV-resistant clear coat. This bad boy will protect your repair job from the sun’s harsh rays and water. Apply it carefully over the repair area, and let it dry completely – I’m talking about as dry as a bone in the desert. It’s crucial to give it enough time so that all your hard work doesn’t go down the drain.
And voila, you’re done! With these steps, your paddle board will be back in the water in no time, and you’ll be like, “What crack?” Now, doesn’t that sound like a plan? Just take it slow and steady, and your board will thank you for it.
How To Repair A Small Crack In Your Hard Paddle Board Youtube
Repairing a Small Crack in Your Paddle Board Oh boy, getting a crack in your hard paddle board is a bit of a downer, wouldn’t you say? But hey, it’s nothing you can’t handle with a little elbow grease and some know-how. Here’s what you need to do to get your board back in tip-top condition:
- Start by cleaning the damaged area thoroughly. I can’t stress enough how important this is! You’ll need to remove any dirt or debris because if you don’t, you’re basically inviting problems to stick around.
- Get yourself some epoxy resin designed for watercraft repair. You want the good stuff that’s going to stick with you through thick and thin, not some dollar-store knock-off that waves goodbye the second it touches water.
- Mix that epoxy properly – it’s like baking a cake, the right proportions matter! If you mix it wrong, it’s not going to set right, and then you’re back to square one with the crack in your board.
- Apply the epoxy to the crack using a putty knife or similar tool. You’ve gotta be gentle and precise here. Think of it like spreading peanut butter on a cracker without breaking it. Delicate, yet decisive.
- Let that epoxy cure according to the instructions – patience is a virtue here. Don’t rush it; good things, like perfectly repaired paddle boards, come to those who wait.
- Once it’s solid, you’re going to want to sand the area smooth. Be careful not to go too sand-crazy; the goal is a smooth finish, not to sand your board into oblivion.
- After you’ve sanded down the repair, it’s wise to add a sealant for good measure. That’s like putting a raincoat on your fix; it keeps everything nice and dry.
- Lastly, give the whole board a once-over. Because honestly, if you’re already in fix-it mode, why not make sure everything else is up to scratch too?
Whew! Alrighty then, if you follow those steps, you should have a paddle board that’s as good as new. Remember, the trick is in the details, so take your time and do it right. Happy paddling, my friend!
What Is The Best Glue For Paddle Board Repair?
Oh boy, when it comes to repairing a wee crack in your hard paddle board, finding the right adhesive can feel like searching for a drop in the ocean. Trust me, you don’t wanna make a mountain out of a molehill here. The best glue – it’s epoxy resin, hands down. Here’s the scoop on why it’s the champ of paddle board fix-ups.
Epoxy resin, see, it’s like the superhero of adhesives. It stands up to water like a champ; we’re talking waterproof once it cures. But the real kicker? It’s got this stellar ability to bond with the fiberglass or foam of your board as if they were long lost besties. If you’re noodling over what type to snag, go for a marine-grade epoxy. This stuff is specifically tailored for watercraft repairs, and it’ll give your board the TLC it needs.
Now, when you mix up this epoxy concoction, it’ll be a two-parter – a resin and a hardener. Mix ‘em up according to the instructions, but don’t dilly-dally; this stuff starts setting up faster than ice cream melting on a hot day. Slather it on the crack with a putty knife or some sorta spreader, smooth it out, and give it time to work its magic. You’ll be back to paddling in no time, minus the leaky board mishap! Just remember, measure twice, mix once – ‘cause mistakes with epoxy can be a sticky wicket.
Inflatable Paddle Board Repair
Whoops, seems like there’s a little mix-up in the topic and context about paddle boards, but hey, let’s roll with it because we’re all about that kayak life, right? Let’s dive into fixing that pesky crack on your hard paddle board and ensure no one’s day out on the water gets sunk.
- Spot the Trouble First - I always say, “Know your enemy before you go into battle,” and in this case, the enemy is that hairline fracture threatening your peaceful paddle session. So what you gotta do is give your board a once-over, look closely to find the crack because sometimes they’re as sneaky as a whisper in a windstorm.
-
Dry Dock Time - Now, I’m not telling you to become a landlubber, but you gotta keep your board out of the water and let it dry like a sunbather on a hot day. Why? Because applying a fix on a wet board is about as useful as a screen door on a submarine.
-
Sand It Down - Don’t go crazy like you’re scrubbing a burnt pot. Just gently sand around the cracked area. It’s like you’re prepping for a nice shave, just smoothing things out for the best results.
-
Apply The Epoxy - Slap on some marine-grade epoxy as if you’re buttering your morning toast – not too much, just enough. Make sure it’s spread evenly because you want that board looking sharp, not pockmarked like the moon’s surface.
-
Patience Is Key - Wait for the epoxy to cure. Now’s the time to watch paint dry or find some grass to watch grow because this step is slow but critical.
-
Final Touches - Once it’s dry, sand the area again, lightly this time – like a soft breeze rather than a hurricane. You’re going for smooth, not stormy.
-
Seal the Deal - If you’re feeling fancy, apply a sealant. It’s like putting on a topcoat after painting your nails – seals everything in and makes it last.
-
Check Your Work - Give it a once-over, run your hands over the repair. You’re looking for any bumps or valleys like you’re checking for a fever or cold spot. It’s gotta be just right.
-
Careful Testing - Ease your board back into the water the way you’d dip your toes in a hot bath. Take it slow to make sure the repair holds up.
- Regular Check-Ups - Like heading to the doc, routinely inspect the repair site for signs of wear or a re-crack because the last thing you need is a surprise leak miles away from dry land.
Now, did I cover everything you need to know about patching up your hard paddle board? Absolutely. Remember, it’s not rocket science but treat it like an art project – meticulous, gentle, and with a touch of love. Keep on paddling, my friends!
Can Paddle Boards Be Repaired?
Absolutely, paddle boards can get a new lease on life with a good patch-up. It’s a bit of a hassle, I admit, but nothing too daunting. Now, I’m not talking about snapping your board in half – that’s a whole other can of worms. We’re focusing on those pesky small cracks that seem to crop up out of nowhere. When they do show up, it’s like they’re testing your patience, right?
But hey, don’t toss that board into the back of your garage just yet. With a bit of elbow grease and some know-how, you can get it back into shipshape. First off, you’ll need to grab yourself a repair kit. And, of course, make sure it’s the right one for your type of paddle board.
What drives me nuts is when you see a crack, and water’s been seeping in – that’s when you’ve got to act fast, or you’re in for a world of hurt. Pulling out the kit, mixing the epoxy, it’s pretty simple – like baking a cake, but less tasty and more chemical-ly. Spreading it over the crack, and then, oh boy, the waiting game. It’s like watching paint dry, only a smidge more literal.
Anyway, once it’s dry, it’s nearly good as new, and you’re ready to take on the waters once more. With just a bit of time and TLC, you can turn that cracked board right around. Now, remember, don’t let the crack intimidate you; show it who’s boss!
How Do You Fix A Small Hole In A Paddle Board?
Oh boy, dealing with a small hole in your paddle board can be a real test of patience, but don’t worry—I’ve got some tips up my sleeve that’ll have you back on the water in no time. So, let’s dive right in, shall we?
First things first, you’re gonna wanna make sure your paddle board is bone dry before you start any repairs. Moisture is the mortal enemy of a good repair job, so take your time and maybe let it sit under the sun for a bit. Once it’s as dry as a bone in the desert, clean around the damaged area. This isn’t just a quick wipe down; you need to get all that grime and wax off. A little rubbing alcohol should do the trick.
Now, for the actual fixing part. You’re going to use some epoxy resin—the kind that’s specifically designed for use with the type of material your paddle board is made of. Precision is key here; we’re not slathering a sandwich with mayo! Apply just enough to fill the hole and then use a plastic scraper to smooth it out. It’s a delicate dance, you want it as smooth as a baby’s bottom so you won’t have any drag when you’re back in the water.
And here’s a cheeky little tip: after applying the epoxy, cover the spot with some clear packing tape. It’ll keep the epoxy flat while it cures, and it won’t stick to it! Genius, right? Give it enough time to cure based on the manufacturer’s recommendation, which is usually around 24 hours.
Remember, patience is a virtue here. Rush it, and you might end up back here, scratchin’ your head and wonderin’ why your board is taking on water faster than a sinking ship. So take your time, do it right, and before you know it, you’ll be paddling away with a big ol’ grin on your face.
How To Repair A Hard Paddle Board
Oh man, paddle boarding is such a freeing activity, isn’t it? But when you notice that small crack in your hard paddle board, it can be a real bummer. Fear not, though! I’ve got some tips to help you fix that up so you can get back out there on the water.
Assessing the Damage
- First things first, give that crack a good look-see. You need to determine how deep and long it is before deciding on the repair approach. This could be the difference between a quick fix and needing a more intensive repair job.
- Feeling the surface around the crack helps, too. If it feels soft or there’s more give than you’d expect, you might be dealing with more than meets the eye.
- Check for any signs of water inside the board by listening for sloshing. Water can weaken the board’s core over time, so we gotta nip that in the bud real quick.
- The location of the crack matters a ton. If it’s close to the rails or seams, I’d say you’ll need to be extra careful with how you go about the repair.
- Take a step back and think, “Is this something I can handle?” If the crack’s lookin’ mighty serious, it might be best to consult a professional. I mean, we’re talking about your pride and joy here, right?
Cleaning the Area
- Okay, so first thing, you gotta clean the area around the crack. No ifs, ands, or buts about it. Be sure to remove any wax, dirt, or grime with the right cleaner so the repair materials will stick properly.
- It’s like prepping a canvas for painting – you gotta be thorough. Sometimes I use a little bit of acetone or alcohol on a rag, but remember to handle it with care.
- Make sure the crack is bone dry before movin’ on. Any moisture can mess up the bond we’re trying to achieve with the repair materials.
- Sanding the immediate area gently with a fine-grit sandpaper can help the filler bond better. Just be careful not to go sandpaper-happy and damage the area around the crack.
- I like to tape off the area with some good ol’ masking tape to keep the repair spot nice and neat. Trust me, it makes a world of difference once you’re done and looking at a clean repair job.
Applying the Filler
- There’s a bunch of options for fillers, but epoxy resin is my go-to. It’s like the Swiss Army knife of board repair, ya know?
- Mix that epoxy according to the instructions, but be quick about it. You don’t have a whole lot of time before it starts to harden.
- Spoon or pour the mixed epoxy into the crack – get it all the way in there, but don’t overfill it. We’re not making a mountain on your board.
- A lil’ patience goes a long way after applying the filler. It’s gotta cure, and that can take some time. I sometimes leave it overnight, just to be sure.
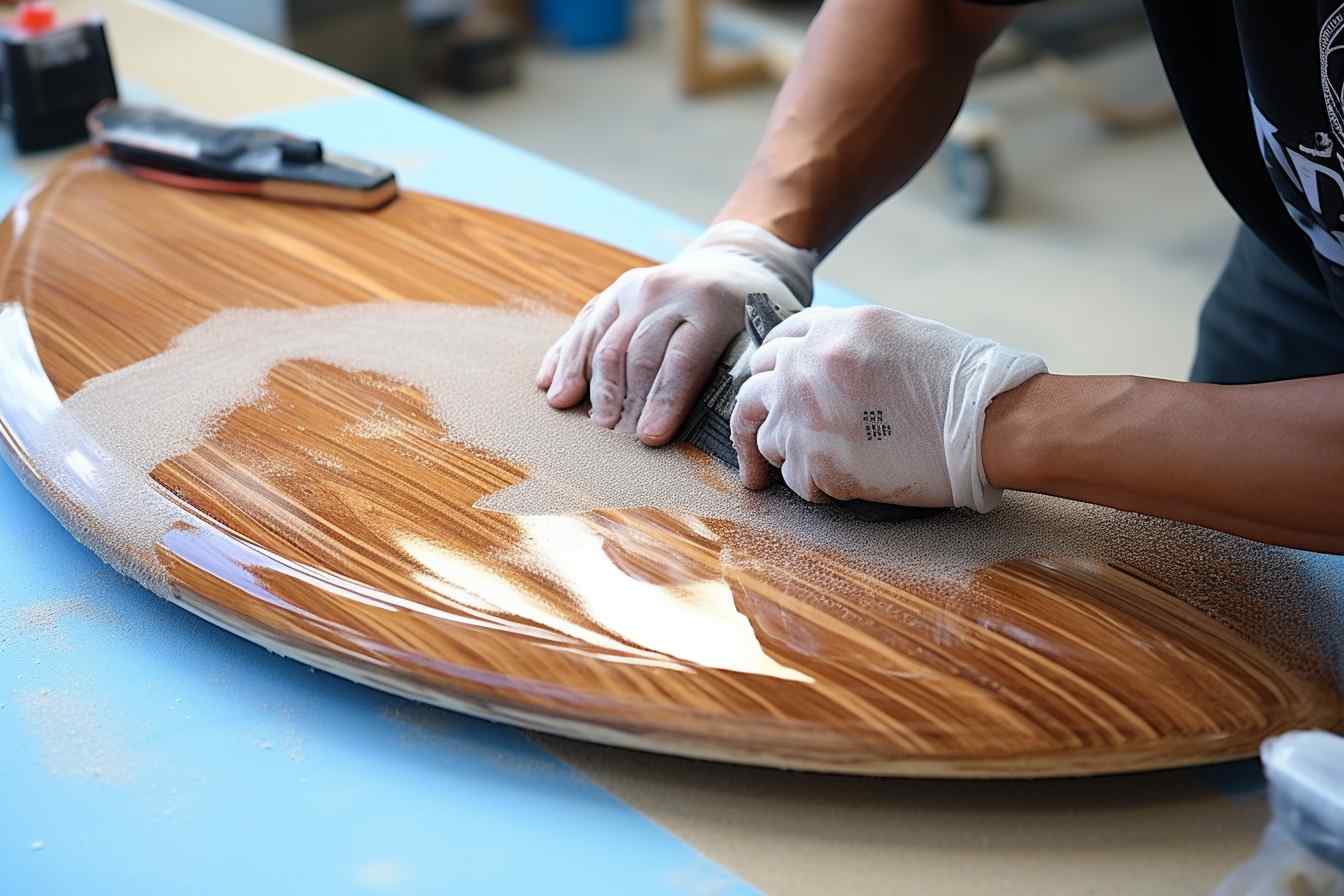
- Once it’s cured, sand it down again delicately. The aim is to make it flush with the rest of your board and so smooth you can barely tell there was ever a crack.
Finishing Touches
- Here’s where it gets fun. Well, if you consider sanding fun, which I kinda do. Start with a rougher grit and work your way down to a finer one for a super-smooth finish.
- You can use paint matched to your board’s color to camouflage the repair. It’s like giving your board a lil’ touch-up.
- Seal the deal with a clear coat sealant over the repaired area. This is like armor for your repair work.
- After all that, give the board a once over—make sure you’re happy with how everything looks and feels before you hit the water again.
- And hey, remember to give it ample time to dry and fully cure before taking it back out. Patience is key – you want your repair to last, don’t you?
These bullets should help you fix that small crack and get your hard paddle board back into tip-top shape. Always follow safety precautions – we’re dealing with chemicals and stuff here, after all. Good luck, and I’ll catch you on the water!
Final Verdict
Alright, when it comes to taking care of a small crack in your hard paddle board, I’ve got some tips I think you’ll find pretty handy. You know, it’s not uncommon for these sturdy boards to get a bit dinged up with all the adventures we take ‘em on.
First things first, you’ll wanna ensure the board is completely dry before you attempt any fix-ups. I mean, working with a wet board is like trying to paint in the rain—just not a great idea, we can agree on that right? Once it’s dry, gently sand the area around the crack. Think of it like prepping a wall before slapping on a new coat of paint. You want the area smooth and ready for the repair materials to cling on to.
Now, you’re gonna need some epoxy resin for this job. It’s like the superhero of adhesives for paddle boards—it binds well and dries harder than that leftover lasagna you forgot in the back of the fridge. Mix it according to the instructions on the package. Just don’t go all mad scientist with it; precision is key here.
Apply the epoxy to the crack carefully, smoothing it out as you go. It’s more art than science, like frosting a cake, but with the added bonus of waterproofing your board. Let it cure for as long as the manufacturer recommends. Patience is a virtue, after all.
Once it’s cured—and here’s where the satisfaction really kicks in—sand the area down again until it’s as smooth as butter on a hot skillet. You want your board to slice through the water, not drag like it’s got a parachute attached, right? Give it a once-over with some fine-grit sandpaper for that professional finish.
The final verdict? With some TLC and the right know-how, you can nurse your paddle board back to health, avoiding the cost and hassle of professional repair or replacement. It’s a bit of elbow grease and attention to detail, but hey—your paddle board’s worth it, isn’t it? Just remember—measure twice, cut once, or in this case, mix once. Be thorough, and your board will be back to supporting your water escapades in no time.
Frequently Asked Questions
What’s the best way to fix a tiny crack on my hard paddle board?
Alright, first off, don’t fret! Repairing a mini crack on your hard paddle board is simpler than it sounds. You’ll want to grab a repair kit made for paddle boards or epoxy resin designed for water gear. Clean the area, apply the epoxy, and let it cure. Make sure you do this in a well-ventilated spot, alright? And be patient; let it dry completely before hitting the waters again.
Can I paddle with a small crack on my board, or should I fix it first?
Honestly, I’d say fix it before you go back out. Water can seep into that crack, and over time, it could worsen or damage the board’s core. So better safe than sorry!
What materials do I need to repair a crack on my hard paddle board?
You’ll need a couple of things: some epoxy resin, which is a must, a putty knife to spread it, and sandpaper to smooth things out. Oh, and don’t forget gloves to keep your hands clean.
Is there a quick fix for paddle board cracks if I’m in a hurry?
Quick fixes? I get it, you’re eager to get back out there. A temporary solution can be something like waterproof tape or a patch kit. But remember, it’s just a temporary fix, so you’ll want to do a proper repair when you have the time.
How long does it take for the repair on a paddle board crack to dry?
It’s not instant – usually takes a few hours for it to set and about a day to fully cure. You’re not alone waiting for that epoxy to dry feels like forever when you just want to get paddling again.
Do I need to paint over the repair on my paddle board?
If you’re all about aesthetics, then yeah, you might want to paint over the repair to match your board’s design. But strictly speaking, it’s not a must-do; the repair’s effectiveness doesn’t depend on it.
Will repairing a crack by myself void the warranty of my paddle board?
You know, it’s possible. It totally depends on the brand and warranty terms. Just to be safe, check that warranty before you start fixing it yourself.
Is there a way to prevent cracks in paddle boards?
Oh yeah, prevention’s key! Storing your board properly, avoiding rocky or shallow areas, and not overtightening your board’s straps can help a lot. Treat it with care, and you should be good.
How do I know if a crack is too big for a DIY repair?
So, if that crack looks like a gnarly spiderweb or it’s wider than a hairline, you might want to get a pro to take a look. When in doubt, professional help is the way to go.
Can I use any type of epoxy for my paddle board repair?
Not exactly. You’ll want to use epoxy that’s specifically meant for watercraft repairs. That way, you’re ensuring the best hold and a proper seal. Trust me, using the right stuff makes a difference.
Melanie Sheila
Melanie Sheila, a passionate hobbyist from the lakeside town of Tahoe, is known for her love of fly fishing and nature photography. With a keen eye for detail, she captures the vibrant life of the lake, from the dance of trout in the crystal waters to the play of light on the pines. Her weekends are often spent along the tranquil shores, rod in hand and camera at the ready.
Comments