Master the Art of Restoring and Enhancing Inflatable Paddle Boards
Summary
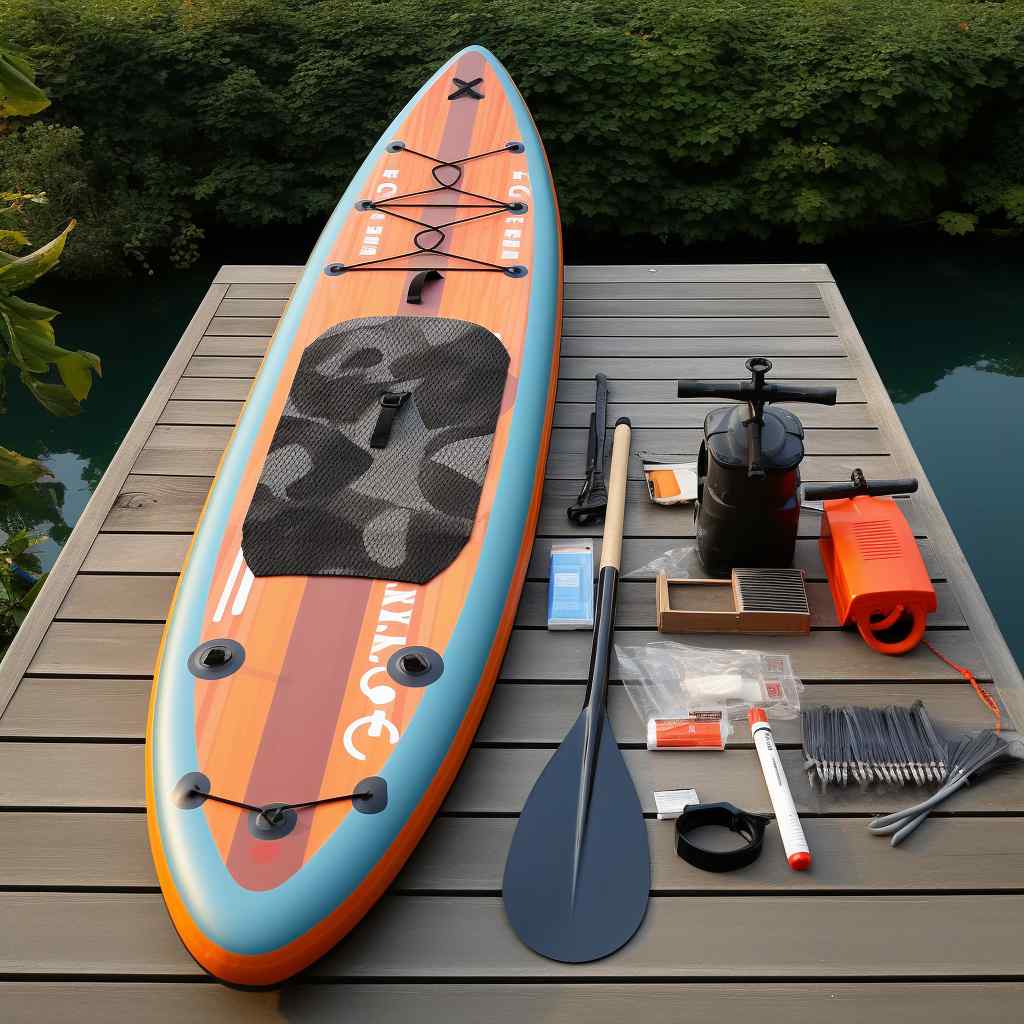
- Intro: How To Repair And Patch Your Inflatable Paddle Board
- Can You Patch An Inflatable Paddle Board?
- What Kind Of Glue To Repair Inflatable Paddle Board?
- Can I Use Pvc Cement On Paddle Board?
- How Do You Fix A Leaking Paddle Board?
- Final Verdict
- Frequently Asked Questions
- What’s the best way to find a leak in my inflatable paddle board?
- Can I fix a paddle board puncture myself?
- How long do I have to wait for the patch to dry?
- Is any special glue needed for repairing my inflatable paddle board?
- Help! My repair kit didn’t come with patches, what do I do?
- Do temperature and humidity affect the repair process?
- My paddle board’s tear is pretty big. Can I still patch it?
- Can I use duct tape for a quick fix on the water?
- What’s the most important thing to remember when repairing my inflatable paddle board?
- Are there any risks to repairing my inflatable paddle board?
- Frequently Asked Questions
Intro: How To Repair And Patch Your Inflatable Paddle Board
Oh boy, let me tell you, when you realize there’s a leak in your inflatable paddle board, it’s like your whole day deflates right in front of your eyes. But don’t worry, I’ve got some tricks up my sleeve to get you back on the water in no time. Patching up your board is kinda like putting a band-aid on after a minor scrape – totally doable with a little patience and the right know-how.
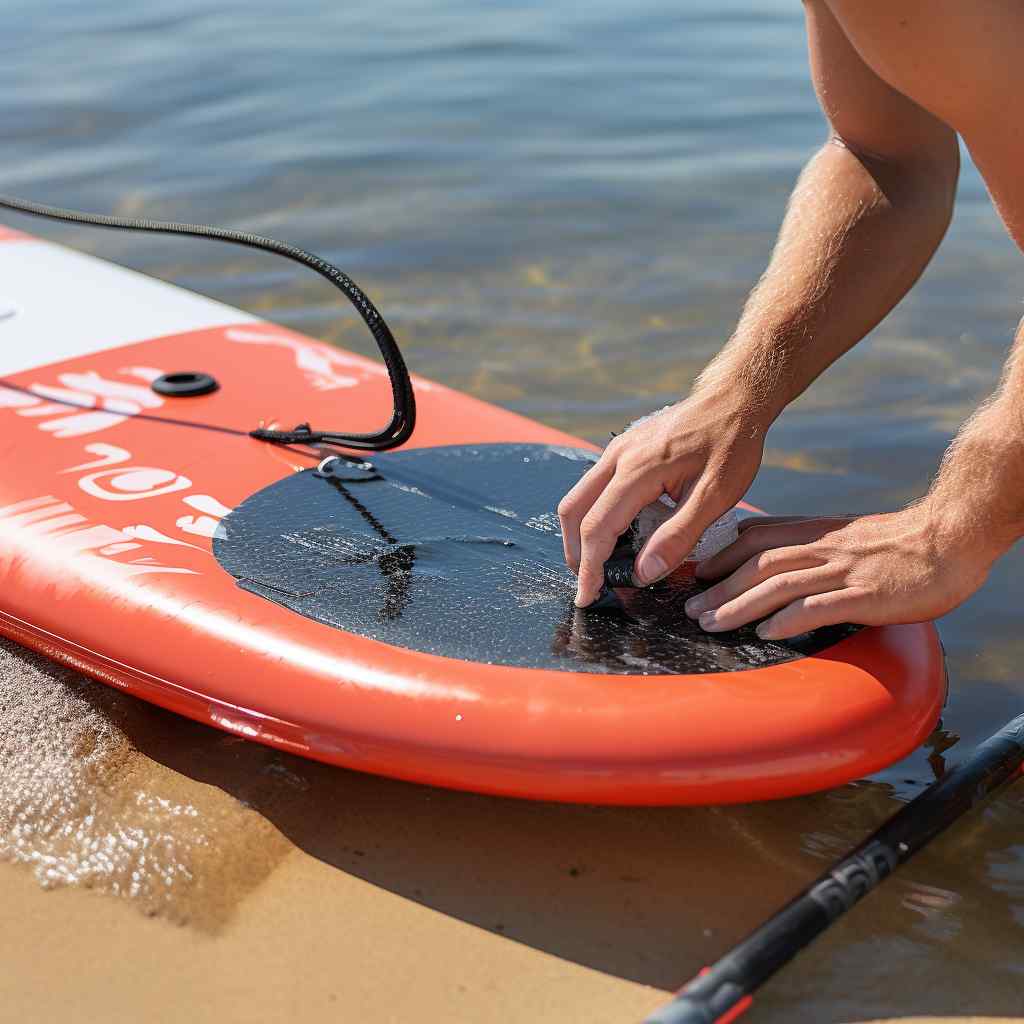
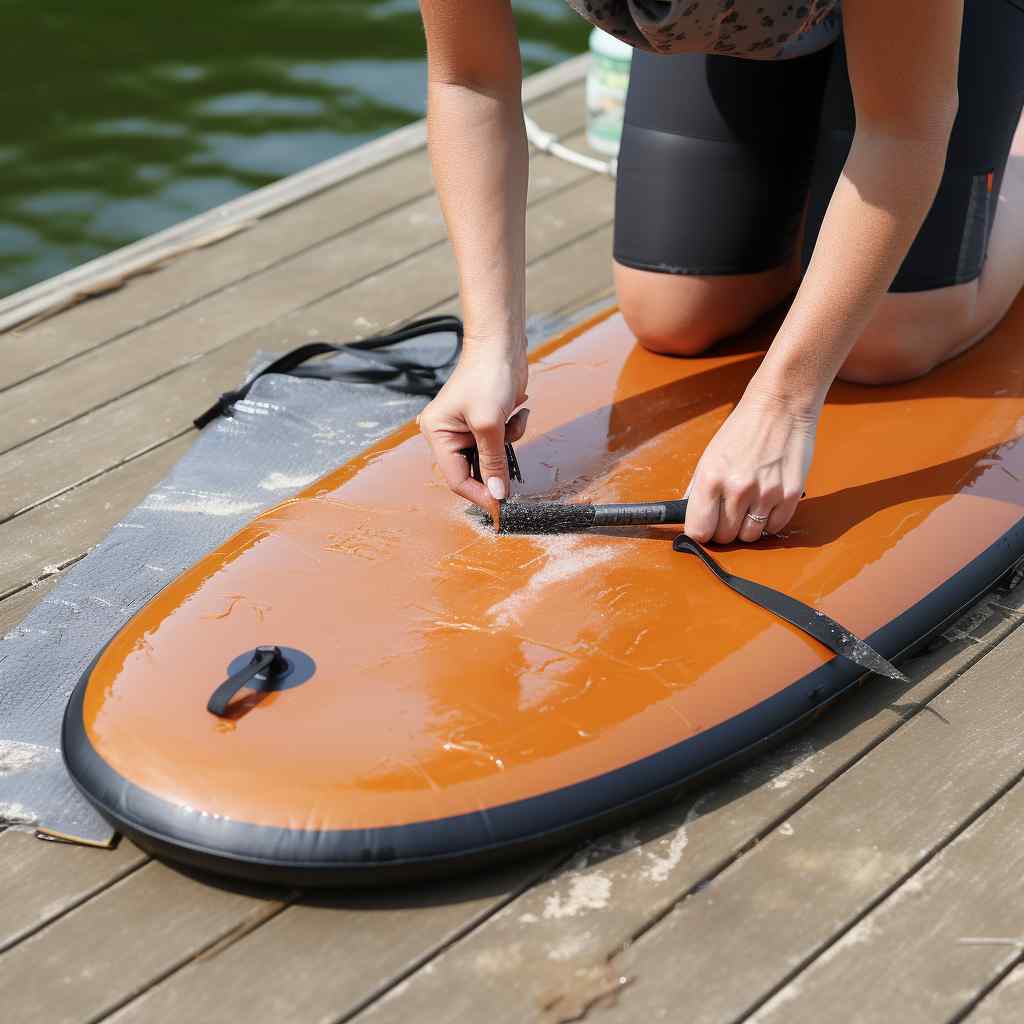
First things first, you gotta find the leak, which can be a sneaky little bugger. Sometimes it’s as obvious as a bald spot on a full head of hair, other times you might have to turn detective and use the old soapy water trick. Once you’ve found it, let the board dry faster than a sunbaked sidewalk in July. Grab your repair kit – it’s your best pal in this situation – and get that patch ready. Cut it in a circle or oval shape, because sharp corners are basically an invitation for the edges to peel up over time.
When you’re applying the glue, think of it as buttering toast, not pouring syrup on pancakes. You want a thin layer, evenly spread, and give it time to get tacky as a tourist in a Hawaiian shirt. Firmly press the patch onto the board and be sure not to leave any air bubbles trapped under there; they’re nothing but trouble.
Once it’s on, you’ll need to be more patient than a cat stalking a mouse - let it cure for as long as the manufacturer recommends, sometimes up to 24 hours. You might be itching to get back to paddling, but trust me, waiting is key. Once that’s done, your board should be as ready for the water as a duck with a snorkel. Happy paddling!
Can You Patch An Inflatable Paddle Board?
Well, sure can! Picture this – you’re out on the water, soaking up the sun, getting your paddle on, and then – oh no – you hear a dreaded hiss. Your heart sinks, and your board starts to feel a little squishy. Not exactly the vibe you were going for, huh? But don’t worry, it’s not the end of the world, or the end of your paddleboard, for that matter. Patching up an inflatable paddle board is totally doable, and I’ll tell ya, it’s not rocket science.
First thing’s first, you need to find the sneaky little culprit of a leak. Sometimes it’s a cinch to spot, other times it’s like playing Where’s Waldo. Once you zero in on that little puncture, giving it a clean is key - can’t have any grime messing up our patch job. And then, it’s time for the star of the show: the repair kit. Most boards come with one, but if yours didn’t, you’ll need to grab an adhesive designed for PVC or whatever material your board is made of – trust me, that’s important.
Now, here’s where the real magic happens. Cut a patch just the right size, slap some adhesive on there, and press it onto the hole. Patience is a virtue, my friend, because you’ll want to give it ample time to dry before you hit the waves again. Test it out to ensure it’s holding air like a champ – and voilà! You’re back in business, ready to conquer the waters once more. It feels pretty fantastic to fix it up yourself, doesn’t it? Gives you a little extra swagger as you paddle. Just remember, go easy on your patched-up pal and keep an eye on it, at least for the first few rides.
How To Repair An Inflatable Paddle Board Seam
Man, isn’t it a bummer when you’re all set for a day out on the water, and you spot a sneaky little seam tear on your inflatable paddle board? Trust me, I’ve been there, and fixing that bad boy up isn’t as daunting as it sounds. Here’s the lowdown:
-
Firstly, you gotta find the tear. No point in fixing what ain’t broken, right? Sometimes it’s a hissing sound or a visible gap.
-
Cleaning the area is key – gotta get rid of that grime and gunk. Soap, water, maybe a bit of rubbing alcohol should do the trick. Let it dry completely, alright?
-
Grab yourself a repair kit. Most paddle boards come with one, but if not, your local outdoor outfitter should have what you need.
-
Patch it up, but don’t rush. Cut a patch in a rounded shape – sharp edges are no good – and make it big enough to cover the tear by a solid inch all around.
-
Slather on that adhesive, and I mean generously! But, you’ll want to read the instructions on that particular glue, since some need you to wait a bit before you throw the patch on.
-
Once you’ve stuck on the patch, apply pressure – and I mean, really lean into it. Some folks use a weight, others just use good ol’ elbow grease.
-
Time is your pal, here. Let the patch cure. Could be a few hours, could be overnight. Whatever it is, patience is your virtue.
-
After it’s dry, give it the ol’ once-over. Check the edges of the patch for any loose spots that might need a touch more adhesive.
-
Finally, inflate your board to the recommended psi and keep an eye on the patch. If it holds air like a champ, you’re good to go!
Remember, tackling this repair job isn’t rocket science, but still, be meticulous, okay? You want your next paddle outing to be flawless, not floundering.
What Kind Of Glue To Repair Inflatable Paddle Board?
Alright, so you’ve got yourself an inflatable paddle board and — oops — you’ve spotted a tear. No worries, let me walk you through getting that fixed up so you can get back on the water lickety-split. First thing’s first, you gotta choose the right kind of adhesive, because not just any ol’ glue is gonna do the trick here. The adhesive you need is a special PVC or urethane glue, and it’s gotta be waterproof — I mean, obviously, because you’ll be surrounded by water!
Now, I can almost hear you asking, “But where do I find this magical glue?” Well, most paddle board repair kits will hook you up with the correct type, so that’s a solid bet. Plus, these kits often come with a patching material that’s already prepped for use, which is handy as all get-out. If you’re more of a DIY enthusiast, you could hunt down some marine-grade adhesive. This type of glue is designed to stand up to the sometimes harsh realities of being in the great outdoors. It’s super durable and can resist some pretty extreme temperatures, so you’re covered whether you’re paddling under the blazing sun or in colder conditions. You just want to make sure that glue is sturdier than a bull in a china shop, because the last thing you need is your repair coming apart mid-paddle.
Now, a little side-note here — pay close attention to the instructions on the glue packaging, because that stuff is potent, and you don’t want to use too much or too little. And let me tell ya, letting it cure for the recommended time is critical. Rush that job, and you might end up with a soggy board and a sunken heart the next time you hit the waves.
How To Repair And Patch Your Inflatable Paddle Board Youtube
Oh boy, aren’t you glad you’ve got that inflatable paddle board? It’s a blast ‘til it gets a puncture, right? Well, don’t fret; I’m here to walk you through patching it up so you can get back to those sweet waves pronto .
- Locate the Leak – First things first, you gotta find that sneaky leak. Submerge parts of the board in water and look for bubbles. That’s your telltale sign right there.
- Dry and Clean – Once you find it, dry off the area completely ‘cause the patch won’t stick to a wet surface. Give it a good clean too, so there’s no grime messing up your repair job.
- Apply the Adhesive – Crack open your repair kit and grab the adhesive. Spread it evenly over the leak and wait a sec; let it get tacky before moving on.
- Cut the Patch – While you’re waiting, cut a patch from the material in your kit. Make sure it’s bigger than the damaged area. Round the corners—it helps to prevent peeling.
- Place the Patch – Okay, now stick that patch on. Press firmly from the center outwards to avoid any bubbles or wrinkles.
- Use a Weight – After smoothing it out, put something heavy on the patch to ensure a tight bond. Let her sit like that for a few hours at least—patience is key.
Remember, no rush jobs here; do it right, and you’ll be back to paddling in no time. Good luck!
Can I Use Pvc Cement On Paddle Board?
Phew, well, here’s the scoop—absolutely, you can! When your trusty paddle board gets a little worn or suffers a puncture, PVC cement is your go-to buddy. Now, it’s essential you’re picking the right stuff designed for PVC material, ‘cause that’s what most inflatable paddle boards are made of, right? This cement creates a super-strong bond that’s heaven-sent for water equipment.
I’ve gotta say, fixing a paddle board might sound daunting, but it’s kind of like patching up a beloved bike tire. I mean, isn’t it just the worst when you’re out enjoying the waves and then suddenly, bam, you’re going down with a deflated board? So you bet your bottom dollar I’m stoked PVC cement can salvage the situation. Without it, I’d be up a creek without, well, a paddle board!
Just remember, when you’re using this magical goo, make sure the area’s clean and dry first. You can’t just slap it on and expect miracles. Apply the cement, let it cure—don’t rush this part!—and then you’re golden. I swear, once it’s all set, it’s tough as nails. Sometimes I reckon it’s even stronger than the original material! So go ahead, get your hands dirty, and fix that board. It’s a real lifesaver and will keep you afloat for many more adventures!
How Do You Fix A Leaking Paddle Board?
Oh boy, fixing a leaking paddle board – now that’s a pickle, but let me tell ya, it’s totally do-able with a pinch of patience! First thing’s first, you gotta find that pesky leak. This means giving the board a good once-over. Sometimes, I’ll inflate the board to its maximum pressure and listen. Yeah, like putting your ear to the board, listening for that tell-tale hissing sound. It’s almost like the board’s whispering its secrets to you if you pay close attention.
When you’ve pinpointed where the little troublemaker of a hole is, mark it. I like using a piece of masking tape; it’s like putting an “X” on a treasure map – the spot where the gold’s buried! But no gold here, just the need for some good old-fashioned elbow grease. Clean around the leak really well – and I mean, it’s gotta be squeaky clean. Dirt is like that annoying friend who crashes the party and ruins the vibe; you don’t want it anywhere near when you’re patching things up.
Now, here’s where it gets interesting. Grab your repair kit – it should have come with the board when you bought it, but if not, they’re easy to snag online. Apply the adhesive to the patch, and place it over the leak. Easy does it; make sure there are no bubbles or creases. It’s like putting a sticker on your laptop; you want it to be just perfect! Then, give the patch time to cure; patience here is the key. Once it’s done, you’ll be ready to hit the water again. Phew, crisis averted, and the adventure continues!
Final Verdict
Oh boy, let’s dive right into the thick of it—repairing and patchin’ your inflatable paddle board can sure be a bit of an adventure. Now, I’m no stranger to the occasional hiccup when I’m out on the water. Trust me, nothing quite like that sinking (no pun intended) feeling when you hear the hiss of air and realize your trusty vessel’s sprung a leak.
First things first, you’ll wanna find the puncture. Simple soap and water will bubble up where the air’s escaping, and bingo, you’ve got your culprit. Patience is a virtue here; don’t rush through it. Once you’ve spotted the troublemaker, make sure the area’s as dry as the humor in my old kayak club.
Then, cut a patch that generously covers the puncture. Round the edges—sharp corners are like an invitation for peeling. Remember, the adhesive is like that one friend who always needs a bit of time to warm up to folks; give it ample time to get tacky. When it’s ready, stick that patch on with the precision of a cat stalking a laser pointer.
Here’s where feelings come into play: you’re gonna press down on that patch like it holds the secret to eternal youth. And folks, be sure to check the pressure afterwards. An under-inflated board is about as useful as a screen door on a submarine, and over-inflation’s just asking for trouble.
? Well, with a steady hand and a bit o’ know-how, your inflatable paddle board is back in business. Sure, it might have a battle scar, but that’s just character. Plus, it’s a heck of a lot better than having to shell out for a new one. Just remember to take care out there, so you’re fixin’ punctures less and enjoyin’ the water more.
Frequently Asked Questions
What’s the best way to find a leak in my inflatable paddle board?
Oh man, finding leaks can be a real headache, but I’ve got a trick or two up my sleeve. Grab some soapy water and spread it over the board when it’s inflated. Keep an eye out for bubbles forming — that’s your sneaky little culprit saying “hello”!
Can I fix a paddle board puncture myself?
Totally! You don’t need to be a pro — I’ve done it a few times myself. Most boards come with a repair kit, or you can buy one. Just follow the instructions carefully, and you’ll be back on the water in no time.
How long do I have to wait for the patch to dry?
Patience is key here! I feel like watching paint dry is more fun, but you’ve gotta give it a good 12-24 hours depending on the adhesive. You’ll thank yourself later for not rushing it.
Is any special glue needed for repairing my inflatable paddle board?
Yup, you bet! You need waterproof adhesive made for PVC or whatever material your board is. Don’t skimp on the glue quality, it makes all the difference.
Help! My repair kit didn’t come with patches, what do I do?
No sweat, just hit your local hardware or watersports shop. Look for a patch kit that’s suited for PVC or the specific material of your board—always works for me!
Do temperature and humidity affect the repair process?
Oh, absolutely! Too hot or too cold, and the adhesive might not settle right. Aim for the Goldilocks zone — not too hot, not too cold, just right. And keep it dry; humidity is a real party pooper for adhesives.
My paddle board’s tear is pretty big. Can I still patch it?
For sure! But if it’s a giant rip, you might need something stronger, like a professional-grade sealant. Sometimes, it’s best to consult with a professional, because you don’t want to mess with the integrity of your floating pal.
Can I use duct tape for a quick fix on the water?
Oh, duct tape, the old quick fix! It might hold up for a short time, but it’s not a permanent solution. Keep it handy for emergencies, but get to that proper repair as soon as you can.
What’s the most important thing to remember when repairing my inflatable paddle board?
Stick to the instructions! I can’t stress this enough — taking shortcuts usually ends up with having to do the whole thing over. And make sure the area is clean; dirt and grease are the enemies of a good patch job.
Are there any risks to repairing my inflatable paddle board?
There are always risks when you’re playing doctor with your gear. If you’re not sure about something, don’t wing it — ask for help or look up some tutorials. Do it wrong, and you might reduce the life of your board, and nobody wants that!
Arthur Kuhn
Arthur Kuhn, a passionate angler from the breezy coast of Maine, is deeply connected to the rhythms of the ocean. An expert in saltwater fishing, Arthur spends his weekends seeking the thrill of the catch, whether it's from the rugged cliffs or aboard his trusty boat. His knowledge of local fish species and tides is remarkable, honed by years of experience. In quieter moments, he enjoys crafting lures and maintaining his fishing gear, each piece holding stories of past adventures. Arthur's love for the sea is not just a hobby, but a way of life, deeply ingrained in his coastal roots.
Comments