Mastering Inflating and Deflating The Ultimate Inflatable Paddle Board guide
Summary
- Intro: How To Inflate And Deflate Your Inflatable Paddle Board
- How Do You Deflate An Inflatable Paddle Board?
- Do You Pin Up Or Down When Inflating Paddle Board?
- How Long Does It Take To Inflate And Deflate A Paddle Board?
- Are Inflatable Paddle Boards Easy To Inflate?
- Final Verdict
- Frequently Asked Questions
- How do I pump up my inflatable paddle board for the first time?
- What’s the fastest way to inflate my paddle board?
- Can I overinflate my paddle board, and how would I know?
- How do I deflate my paddle board efficiently?
- What should I be careful of when inflating or deflating in hot weather?
- Can I use a bike pump to inflate my paddle board?
- Is there a specific technique for rolling up my deflated paddle board?
- Do altitude changes affect my paddle board’s inflation?
- Help! I’ve lost my paddle board’s air valve cap. Can I still use it?
- How long does it take to inflate a paddle board manually vs with an electric pump?
- Frequently Asked Questions
Intro: How To Inflate And Deflate Your Inflatable Paddle Board
Oh man, inflating and deflating your inflatable paddle board is like, the quintessential skill you gotta master to get the most outta your time on the water. Trust me, nothing beats the feeling of gliding on a perfectly pumped-up board. But get this - it’s not just about huffing and puffing, you’ve got to know the nitty-gritty so you can hit the water like a pro.
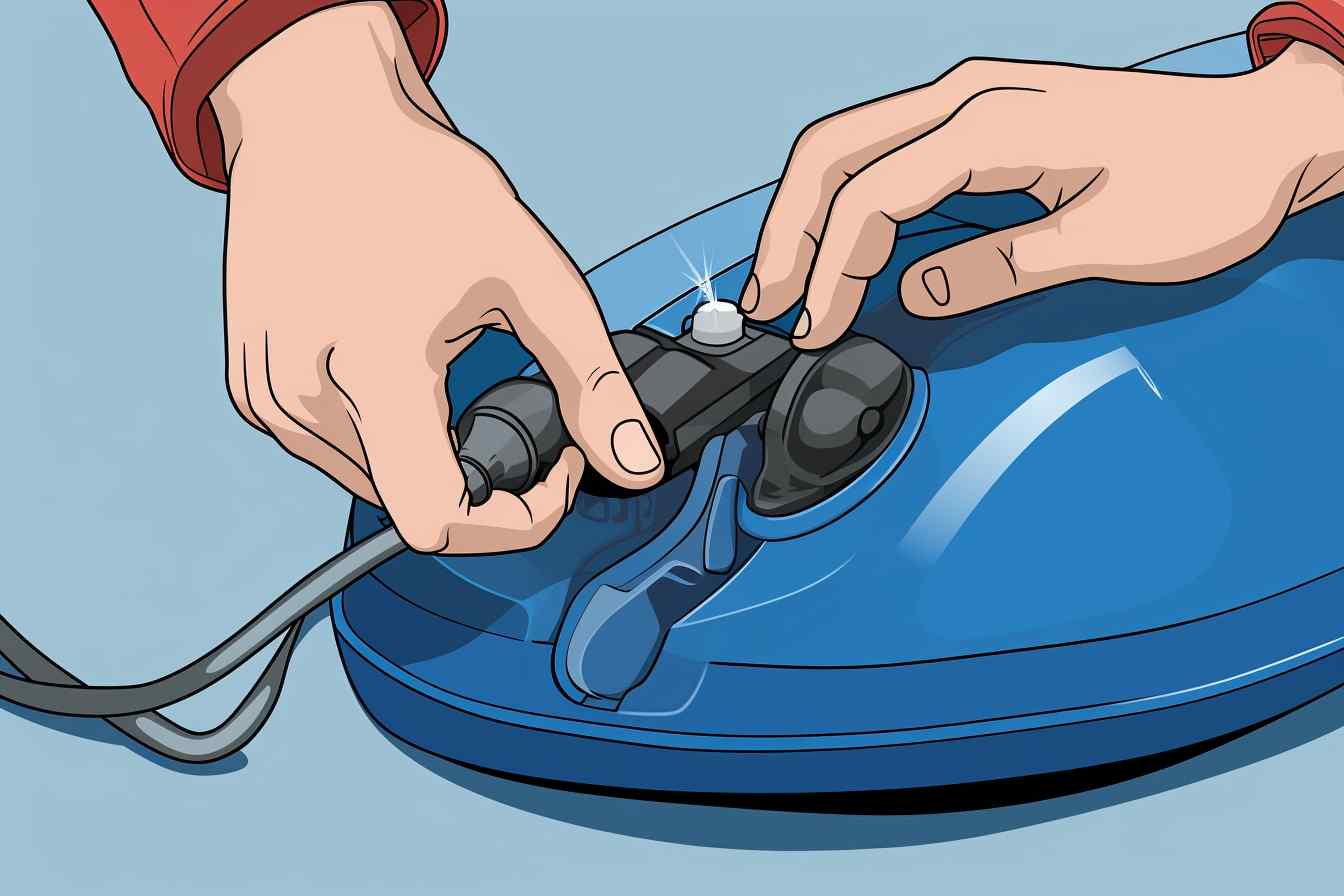
First up, unroll that bad boy on a flat surface, steer clear of sharp objects ‘cause, you know, punctures are a bummer. Then find the valve, typically at the tail end, and make sure it’s in the closed position. That’s the part you twist to keep the air in. Hook up the pump - hopefully you’ve got one of those high-pressure pumps that are a game-changer for getting the PSI just right.
Pump it up, and keep an eye on the gauge. Most boards need about 12-15 PSI. It’ll take some elbow grease, but think about those muscles you’re working! Once you hit the right pressure, close the valve tight, and you’re golden.
Now, when you’re all done and tuckered out from a day of adventures, deflating is a piece of cake. Just open the valve and watch the air whoosh out. Kind of satisfying, right? Press on the board a bit to help squeeze the air out quicker. Then, fold it up neatly. Remember, a tidy board is a happy board – and it’ll be less of a hassle the next time you’re itching to hit the surf.
Phew, that’s about the gist of it. Keep practicing, and before you know it, you’ll have this down like the back of your hand and be the envy of the shoreline with your quick setup and takedown skills. Just don’t forget to enjoy the ride – that’s what it’s all about, right?
How Do You Deflate An Inflatable Paddle Board?
Busting the Myth – Deflation Is As Easy As Inflation!
Now let’s talk turkey – deflating your inflatable paddle board isn’t rocket science, but sure thing, it’s got its knacks. First off, you’ll want to find that trusty valve where all the magic happens. Give it a twist counterclockwise and listen to that hiss of air whizzing out — music to the ears, right? Now, patience is key here; just let it do its thing until the board feels floppy as a pancake.
Once the whooshing stops, do the heavy lifting, or, in this case, pressing. You’d be amazed at how much air is still lurking in there! Apply some good ol’ elbow grease and fold the board over a few times to expel that last bit of stubborn air. It’s like squeezing a toothpaste tube – you know there’s more in there!
Sure enough, getting all the air out makes a world of difference when it comes to storage. You don’t want a bulky board hogging up all the space, right? So, take the time to press down and roll it up nice and snug. It’s sort of therapeutic, I reckon! I always feel a pang of satisfaction when I get it just right and can tote my board back home without looking like I’m hauling a beached whale.
Now, don’t rush off once it’s rolled up – check back on that valve. You’ll want to flip it clockwise, sealing the deal. This tiny twist ensures no sneaky air gets back in because nobody’s got time for inflatables with a mind of their own. And voilà, your board is stowed away, primed for the next watery escapade! Keep these tips in mind, and you’ll be a deflation pro in no time.
Do You Pin Up Or Down When Inflating Paddle Board?
Oh boy, inflating your paddle board is sorta like blowing up the world’s burliest balloon, and the direction your valve pin’s in makes all the difference in the universe. Lemme break it down for ya – when you’re ready to pump up that bad boy, the valve pin should be in the up position. This little move is basically the green light for air to rush in and not bail right back out.
Think of it this way – you’re at a party, and you want to fill up a balloon. You wouldn’t want all that huffing and puffing to go to waste because the air’s sneaking out the back door, right? Same story with your paddle board. The pin up means you’re locking the door behind the air. It’s like saying, “Welcome to the party, air. Now stay awhile.”
Then there’s that sweet moment when the board’s as stiff as a board – sorry, couldn’t help myself – and you’re ready to hit the water. But let’s not jump the gun! Before you head out, give the valve a little push and twist clockwise. This lil’ tango move engages the pin, keeping it down and locked during your aquatic adventure. Just remember, a paddle board with a pin accidentally left up is like a ticking time bomb of deflation, ready to put a serious damper on your day.
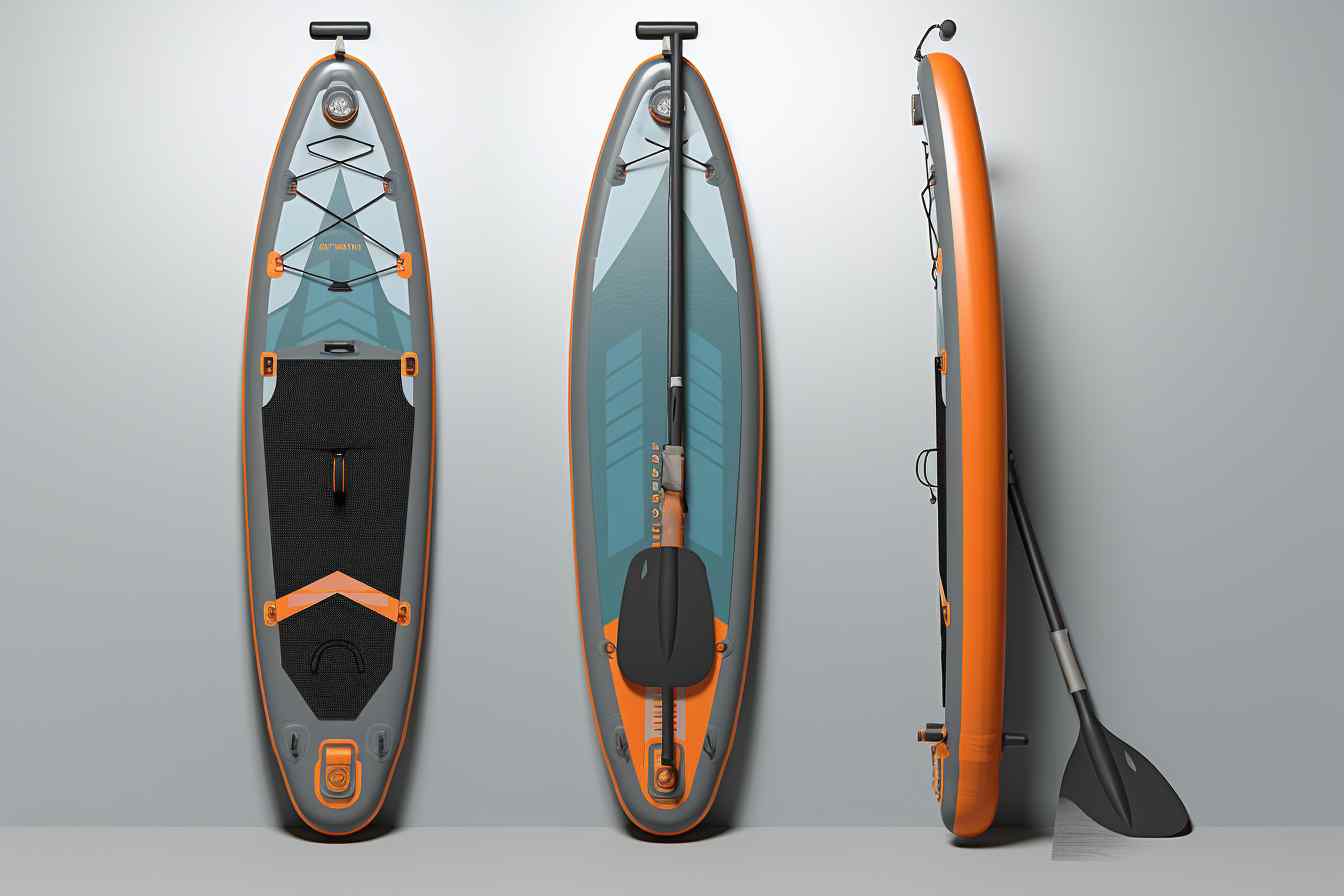
How To Roll Up Inflatable Sup With Fins
So, you’ve had an absolute blast out on the water with your SUP, and now it’s time to pack up. Rolling up your inflatable paddle board with fins can seem tricky, but chill, I’ve got you covered. Here’s the lowdown, step by step:
-
Lay it flat: First off, after you’ve sipped on some water and caught your breath, you’ll want to lay your board flat on a clean surface. Make sure it’s the top side with the deck pad facing down.
-
Remove the fins: Carefully take off any detachable fins. If you leave these bad boys on, you’re asking for a rough time trying to roll up the board, not to mention you risk damaging them.
-
Deflate the board: Open the valve and let all the air out. Sometimes, I like to lie down on top of the board to push out the last bits of air – consider it a hug goodbye to a good day’s paddle.
-
Start at the nose: Begin rolling from the nose (that’s the front for any newbies out there). Roll tightly to squeeze out any sneaky air left trying to hide inside.
-
Roll past the fin boxes: When you get to the part where the fins used to be, keep rolling but maybe with a little extra oomph. The fin boxes can be a bit stubborn, so show them who’s boss.
-
Strap it up: Once you get to the tail end and your board’s all rolled up nice and snug, grab those straps you nearly forgot about and wrap them around the board to keep it from unrolling in the trunk.
Remember, it’s not a race to get your paddle board rolled up – take your time, do it right, and your board will stay in primo condition for loads of future adventures.
How Long Does It Take To Inflate And Deflate A Paddle Board?
Whew, let’s tackle one of the most burning questions for paddle board enthusiasts—how long does it take to get these babies inflated and ready for the waves, or deflated and packed up? Now, inflating a paddle board isn’t exactly a race against the clock, but I get it, you don’t wanna waste precious sunlight. So, on average, it could take anywhere from 5 to 10 minutes to pump up your board using a hand pump. Yeah, it’s a bit of an arm workout, but who doesn’t love some bonus exercise? If the thought of manual labor before hitting the water doesn’t float your boat, there are electric pumps that can do the job in half the time! Speaking of a chill pill, those gizmos are a lifesaver.
Now, flipping the script to deflation—it’s a breeze! You pop open the valve and in about 3-5 minutes, your inflatable companion is winded and ready to roll up. No sweat, right? Just make sure you’re pushing out as much air as you can, otherwise, trying to fit a semi-inflated board into its storage bag is like wrestling an octopus into a string bag—not fun! And remember, patience is key—you don’t wanna rush and end up damaging your board or, heaven forbid, misplace a fin because you were in a hurry. Take it easy, enjoy the process, and your board will be shipshape for its next adventure.
How To Inflate And Deflate Your Inflatable Paddle Board Youtube
Ah, so you’ve got yourself an inflatable paddle board, huh? Great choice! They’re fantastic for stowing away in small spaces and taking on the go. But, before you get to paddling, you’ll need to know the ropes of inflation and deflation. Let’s dive right in with some savvy tips.
How to Inflate Your Inflatable Paddle Board
- Start off by unraveling your board on a flat, smooth surface, keeping sharp objects at bay. You wouldn’t want a puncture before you’ve even hit the water!
- Locate the valve – it’s usually marked and should have a cap on it. Make sure it’s in the closed position before you connect the pump; this typically means the pin inside should be in the up position.
- Attach the pump hose to the valve on your board. Ensure a snug fit; otherwise, you’re just pumping air into the great wide open, and that’s not going to get you very far.
- Begin to pump – go ahead and use some elbow grease! If you’ve got a dual-action pump, the going will get easier as you build pressure. Your board’s ideal PSI should be noted somewhere handy – typically around 12-15 PSI, but it can vary.
- Keep an eye on the pressure gauge. You want it to hit that sweet spot of your board’s recommended PSI; under-inflated and you’ll wobble, over-inflated and you risk damage.
- When you hit the target pressure, disconnect the hose with a quick twist. Pop the cap back on, and voi là, your paddle board’s all puffed up and raring to go!
How to Deflate Your Inflatable Paddle Board
- After a fun day out, deflation is the necessary but less thrilling sequel to inflation. Before starting, rinse off any sand, salt, or crud that’s hitched a ride on your board.
- Find the valve – remember, the same little buddy you introduced yourself to earlier. Push the pin down to open it up, and you’ll hear the hiss of escaping air. That’s the sound of progress!
- Patience, my friend – let most of the air rush out on its own first. Rushing here isn’t going to speed things up much.
- Once it’s done exhaling, roll up the board starting from the end opposite to the valve. This pushes out any stubborn air lingering inside.
- When you’ve gotten it all snug as a bug, close the valve again. Wouldn’t want any damp air sneaking back in, would we?
- Stow your board away in its carry bag, but avoid playing tetris with it; folding too tightly can make creases that lead to weak spots over time.
Remember, treat your inflatable paddle board with a little tender loving care, and you’ll have a trusty companion for many season’s worth of adventures. Just keep in mind, while it’s a sturdy beast, it’s not unsinkable, so steer clear of those sharp rocks and don’t skip on regular maintenance. Happy paddling, and till next time, keep your paddle in the water and your spirits high!
Are Inflatable Paddle Boards Easy To Inflate?
Well, let me tell ya, the whole process might seem a bit daunting at first glance, but honestly, it’s a breeze once you get the hang of it. It’s like riding a bike – daunting at first, but second nature before you know it. So you’ve got your brand-new paddle board, and you’re itching to hit the water, right? Here’s the scoop: most of ‘em come with a manual pump, and you’ll be pumping away for a good while if you’re relying on good old arm strength.
Now, I’ve got to admit, it can be a bit of a workout. But think of it as a warm-up before you get to the enjoyment of gliding across the water. Some paddle board aficionados opt for an electric pump, which is a game-changer. It’s like the difference between chopping wood with an axe versus a chainsaw – less sweat, more precision, and a heck of a lot faster. You just set it up, hit the button, and voila! Your board will be ready to go in no time flat.
And here’s a little side note: Make sure to check the PSI level recommended for your board. Otherwise, you’re shooting in the dark with how much air to pump in there. Too little, and you’ll be riding lower in the water than a submarine with a screen door. Too much, and, well, you’re risking your board turning into a balloon at a kid’s birthday party – pop!
Remember, it’s not rocket science. With a dash of patience and a bit of elbow grease – or an electric pump – you’ll be set to hit the waves like a pro. Keep that PSI in check, and you’re golden.
How To Deflate Paddle Board With Electric Pump
Oh boy, inflating and deflating a paddle board with an electric pump is a piece of cake once you get the hang of it, isn’t it?
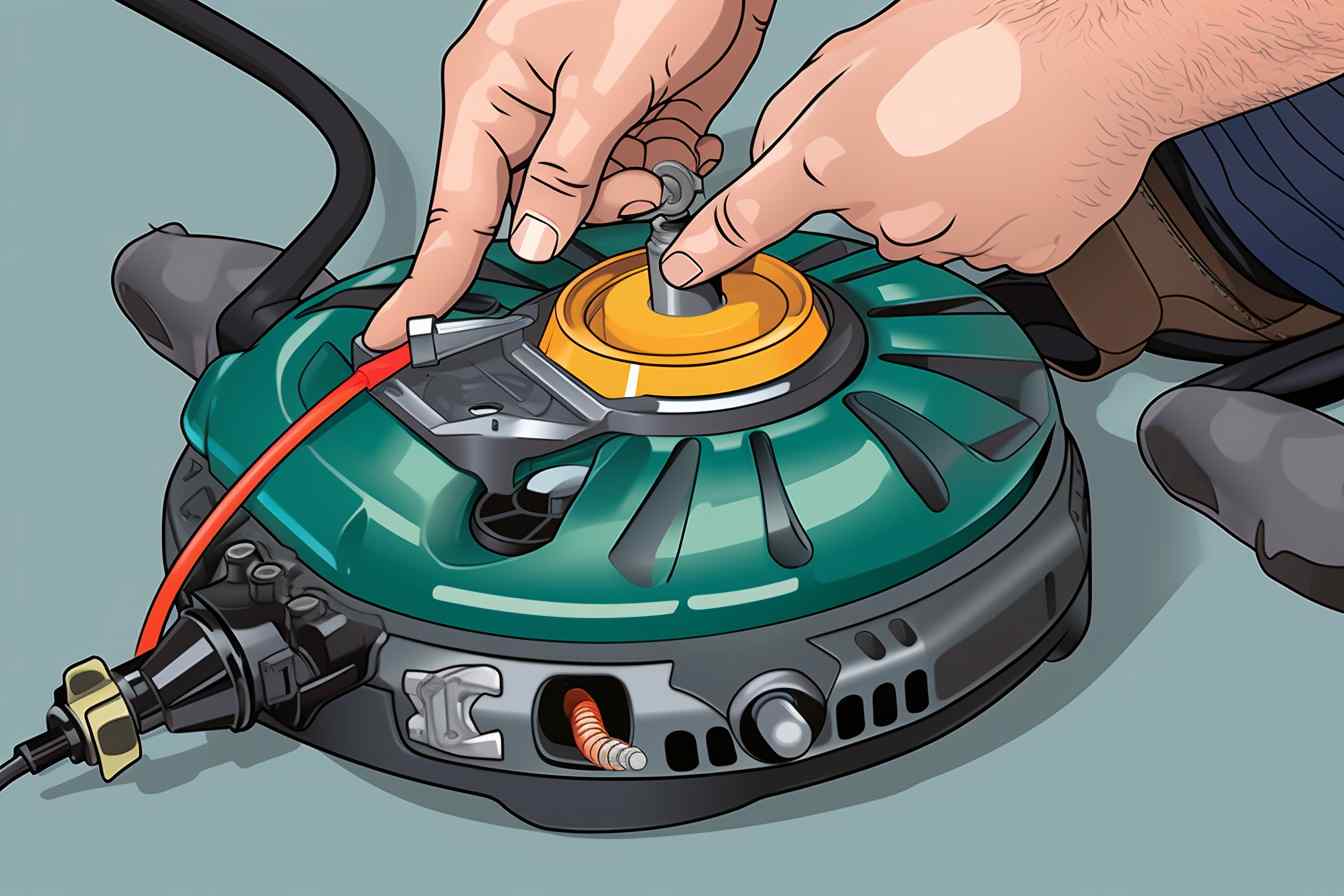
- Get the right adapter: Make sure you’ve got the compatible adapter for your electric pump. It’s like trying to fit a square peg in a round hole if you don’t. Major bummer!
- Connect to a power source: Your electric pump needs juice to run, so hook it up to an appropriate power source. Usually, a car battery does the trick.
- Attach the pump to the valve: Gently attach the pump’s hose to the paddle board’s valve. You want it snug, but not as tight as a jar of pickles you can’t open.
- Set the pressure: Before you let it rip, set your pump to the recommended PSI for your board. Going overboard with pressure could spell disaster for your board.
- Keep an eye on it: As the pump does its thing, keep a watchful eye. You don’t want your board puffing up like a marshmallow over a campfire.
- Turn off the pump: Once your board hits the sweet spot with the pressure, switch off the pump. It’s better to be safe than sorry—you wouldn’t want to overinflate.
- Disconnect everything: Carefully remove the hose and adapter, and stow away your electric pump like it’s a treasure chest. You did it!
And now, for the flip side—deflating this bad boy.
- Ensure the pump is in deflate mode: Double-check that your pump is switched to deflate. Sounds obvious, but even the best of us can have a “doh” moment.
- Re-attach the hose: Connect the hose back to your paddle board’s valve. It’s like reconnecting with an old friend.
- Let the air out: Hit the magic button and watch the air whiz out of your board. It’s kind of therapeutic, I’d say.
- Roll up the board: As the air escapes, start rolling up the board from the opposite end of the valve to get any shy air out.
- Keep the valve open: Once it’s all flat and sad-looking, keep the valve open to avoid any trapped air making a surprise comeback.
- Store properly: Once deflated, make sure it’s stored away from any sharp edges or heat sources. Treat it like the delicate pancake it is post-deflation.
Remember, folks, it’s all about the process. Take your time and do it right – your inflatable paddle board will thank you by providing countless hours of adventures on the water.
Final Verdict
Alright, inflating your paddle board, it’s something that can feel like a bit of a workout before the actual workout, you know what I mean? But stay with me here, it’s actually pretty straightforard once you’ve done it a couple times. What you need is the pump that usually comes with your board. Typically, it’s a manual pump, so you’re gonna be putting some elbow grease into it. Now, what’s fun about the pump is it’ll have this little gauge on it, so you can see the pressure rising as you go. It’s kinda like watching the suspense build in a good action movie.
When you start, make sure the valve on your board is in the closed position – this usually means it’s popped up. Connect the pump hose to it - you’ll hear a little click sound. Feel that rush of anticipation? That’s normal – we’re about to bring this thing to life! Now pump away, and as you do, your board starts to take shape. Most paddle boards need to hit between 12 to 15 PSI – that’s like the sweet spot for rigidity without going overboard. Once it’s inflated, push down and twist the valve to lock that air in tight. Give the board a pat. It’s ready to go.
Deflating, it’s even simpler. Just a quick press down and a twist of the valve and the air comes whooshing out. It’s quite the earful, so be ready for it. Once most of the air has rushed out and it’s looking a little sad and deflated, you can start rolling it from the opposite end to push out any lingering air. It’s kind of therapeutic really. And voila! Your board is compact again and ready to be packed away until your next adventure. Just remember to let it dry out first – no one likes mold.
– Once you get the hang of it, inflating and deflating your inflatable paddle board is no sweat. Staying patient and not rushing the process is key. Your muscles might complain a tad after the manual pumping, but think of it as a pre-paddle warm-up! And when it’s time to pack up, it’s pretty satisfying pressing that valve and hearing all your hard work whoosh away – it’s all part of the experience. Keep at it, and you’ll be a pro in no time.
Frequently Asked Questions
How do I pump up my inflatable paddle board for the first time?
Oh boy, the first inflation is always a thrill! You’ll want to grab your pump, usually a high-pressure one, and connect it to your board. Make sure that valve’s in the closed position – it’ll look like it’s sticking up. Then, start pumping away! You’ll feel the burn in your arms, but keep going until you hit the recommended PSI, which is typically around 15.
What’s the fastest way to inflate my paddle board?
Want to save some time and effort? I get it! An electric pump is a game-changer. Just connect it, set the PSI, and let it do its thing. Before you know it, you’re ready to hit the water.
Can I overinflate my paddle board, and how would I know?
Absolutely, and that’s a no-go! Over-inflation can damage your board. Keep an eye on the pressure gauge; never go over the recommended PSI. If the board feels rock-hard and the pump is getting super tough to push, it’s a sign to stop.
How do I deflate my paddle board efficiently?
Just like you’re eager to get on the water, I bet you’re keen to pack up quickly too! Open the valve by pushing and twisting – air will whoosh out. Then, roll the board up from the opposite end, squeezing out that air. Voila! You’re all set.
What should I be careful of when inflating or deflating in hot weather?
Hot weather can be tricky! As the sun bakes your board, the air inside expands, and pressure goes up. Pump it a bit less than usual to avoid over-inflation. When deflating, let it cool in the shade first to protect the material.
Can I use a bike pump to inflate my paddle board?
Well, trying is fine, but bike pumps usually don’t have the oomph for paddle boards. You need a high-pressure pump to reach that 15 PSI sweet spot. Otherwise, you’ll be at it forever and still end up with a squishy board.
Is there a specific technique for rolling up my deflated paddle board?
Yep, technique matters! Start from the nose, keep it tight, and roll evenly to push that air towards the valve. Think of rolling up a sleeping bag, but you’re aiming for neat and tidy to tuck it away in its bag.
Do altitude changes affect my paddle board’s inflation?
You betcha! High altitudes mean less atmospheric pressure. If you inflate at sea level and head to the mountains, the pressure inside can drop. You might need a top-up. Going downhill? The opposite happens – let some air out so it doesn’t go boom.
Help! I’ve lost my paddle board’s air valve cap. Can I still use it?
I’ve been there, and sure, you can still use it, just keep an eye on it. The cap keeps the valve protected and prevents leaks, but if you’re gentle, you should be alright for a while. Meanwhile, hunt for a replacement cap.
How long does it take to inflate a paddle board manually vs with an electric pump?
Manually, you’re looking at a good 5–10 minutes of pumping, depending on your pump and vigor. With an electric pump, it’s a hands-free affair that’ll take roughly the same time, but you can chill and save your energy for paddling.
Emily Bradley
Raised in the coastal town of Maine, Emily Bradley is a passionate sea angler and a lover of all things oceanic. Her weekends are spent on her small boat, casting lines into the deep blue, seeking the thrill of the catch. With a keen eye for the subtle changes of the tides and a deep respect for marine life, Emily's hobby is more than just fishing; it's a dance with nature. Her evenings are often filled with crafting detailed lures and reading about marine conservation, reflecting her commitment to sustainable fishing practices. Emily's connection with the sea is a defining part of her identity, deeply rooted in the rhythm of the waves and the call of the ocean.
Comments